I shared with you last time that out sweet Bethany turned 12. We enjoyed a fun-filled day with her. The girls of the house went to Panera Bread for breakfast. The guys here aren't too keen on eating there (crazy I know!), so they went to Men's breakfast at our church instead.
Either way, I think everyone was happy.


After breakfast, we went to the zoo. We could not believe how beautiful the weather was!
(It was almost shorts weather. I can't remember ever being able to be outside for Bethany's birthday, because the weather is always yucky or too cold.)
The zoo is always one of our favorite places to go. I thought it was interesting for Bethany to choose to go there. Still part of that inner "little" child conflict, maybe? Hmm, I suspect next year it will not be on the top of her choices for places to celebrate her birthday. Until then, we will continue to enjoy these type of outings.
It was just a nice day to celebrate her.


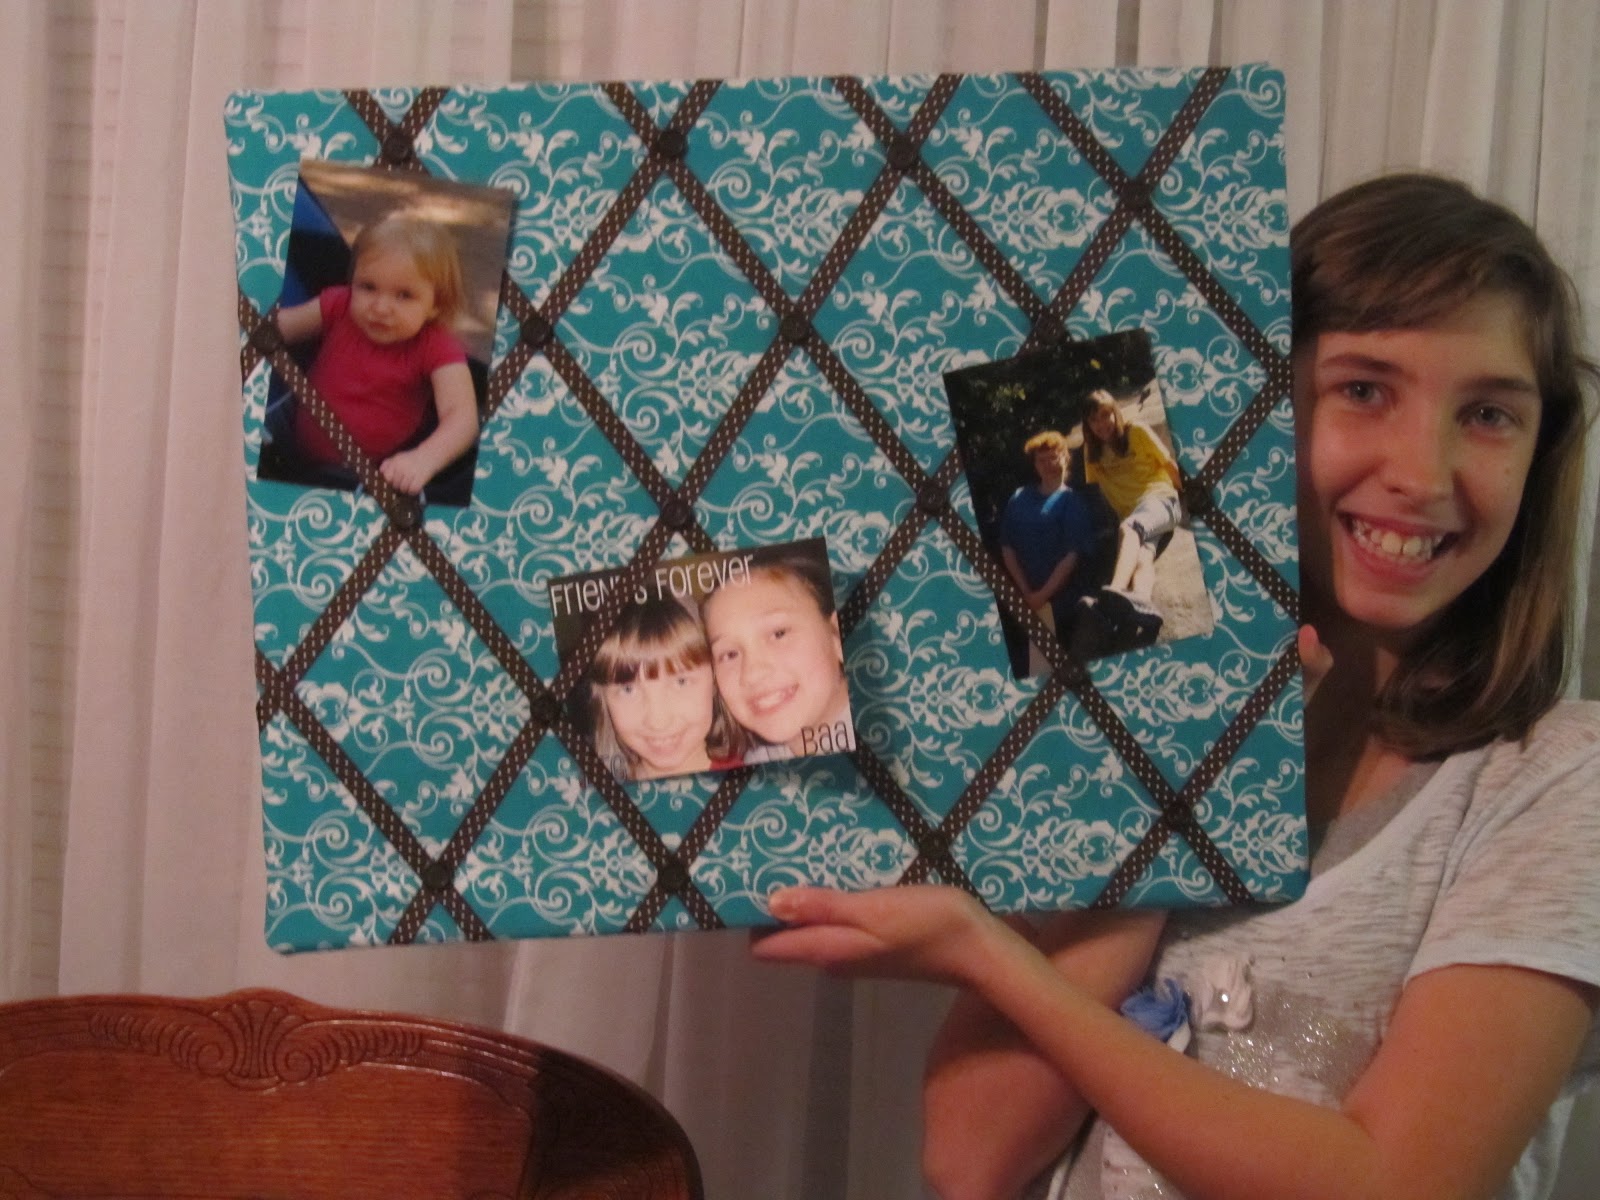
This year for her birthday, I wanted to find a memory board for her room. She has been putting her pictures up with sticky tack and I desire something a little more orderly.WOW! I was astounded at how expensive these little boards of fabric and ribbon could be. I even saw one online for $60. Yes, you read that right! I just wanted something simple. At that price it had better be able to snap, print, and put the pictures on the board itself! So, a trip to Hobby Lobby was definitely in order.
I knew that basically the board is like a canvas with fabric and ribbon on it, unless you are wanting to use thumbtacks on it. Then you would need to buy a cork board. Bethany just wanted one for her many photos that she has.
I purchased a canvas and let Bethany choose the fabric and ribbon for it. She chose a beautiful aqua print designed by Brother Sister Studios. Then she chose a brown and white polka dot ribbon and brown buttons for the embellishment.
This project took literally 20 minutes to complete!Certainly my kind of project:)

This project took literally 20 minutes to complete!Certainly my kind of project:)
Supplies you will need:
1 artist canvas - size depends upon your preference, we chose the 16 x 20
fabric of your choice - I bought 1 yard of fabric, because I wanted to double the fabric to give it a
a thicker look. This will also depend upon the size canvas you will use.
2 rolls of coordinating ribbon - I used the 3/8 in x 15 ft ribbon roll and only used 1/3 of the second
roll
staple gun
glue gun
glue gun
embellishments

Begin by ironing your material. If you did purchase extra, go ahead and fold in half.
Place canvas on top of fabric and cut any excess. Just be sure to leave enough to make the corners look neat.
I used the staple gun to secure the fabric in one spot on the frame so that I could get it nice and tight on each long side.
Then begin with the corners. After you are finished with those, then you can move on to the sides. Just check to make sure that your fabric stays taut.


Next comes the ribbon. I did not measure. I know all my perfectionist friends just gasped! I felt like living a little on the edge with this project. I simply stapled one end of the ribbon on the back and crossed it over the front and then stapled it on to the opposite side on the back, cutting as I went.


Then repeat the process going
the other way.

Once I had the ribbon in place, I stapled the ribbon at the cross points to make sure the pictures had a secure place to rest.
Then add your embellishments. Bethany chose some brown buttons that I had and I hot-glued them on. You could mix and match different colors. Whatever makes you happy! There are so many things you could do. Buttons, flowers,wooden letters,etc...
Voila! You now have a fast and inexpensive memory board!

I am thinking these would make great birthday presents. The possibilities are endless.
Oooohhh, I think I even just solved my ever-present problem of coming up with a unique birthday gift.YAY!
So, now I off to make my boys one! I am thinking basketball, football, soccer....
Thanks for stopping by!
I love my Memory Board:) :) :) I hope you guys will make one!!!!
ReplyDelete